Audio and Speech Processing Development Environment

Docker

1
docker-compose build
1
systemctl start docker
1
systemctl enable docker
1
sudo systemctl stop docker

If there is warning like: Warning: Stopping docker.service, but it can still be activated by:**

1
docker.socket**

So we can stop the socket

1
sudo systemctl stop docker.socket
1
systemctl enable docker
1
systemctl restart docker
1
sudo docker-compose up

项目中架起docker环境

1
docker system prune

Cuda

image-20220730154010169

nvidia-smi

image-20220801144443432

Issue 1:

1
2
NVIDIA-SMI has failed because it couldn't communicate with the NVIDIA driver. 
Make sure that the latest NVIDIA driver is installed and running.
1
2
sudo apt install dkms
sudo dkms install -m nvidia -v 418.87.00 # replace the result from ls /usr/src | grep nvidia

Check the NVIDIA number:

1
ls /usr/src | grep nvidia     

This will solve this common issue.

Install the CONDA for WSL2

Please follow this link:https://docs.nvidia.com/cuda/wsl-user-guide/index.html

1
2
3
4
5
6
wget https://developer.download.nvidia.com/compute/cuda/repos/wsl-ubuntu/x86_64/cuda-wsl-ubuntu.pin
sudo mv cuda-wsl-ubuntu.pin /etc/apt/preferences.d/cuda-repository-pin-600
wget https://developer.download.nvidia.com/compute/cuda/11.7.0/local_installers/cuda-repo-wsl-ubuntu-11-7-local_11.7.0-1_amd64.deb
sudo dpkg -i cuda-repo-wsl-ubuntu-11-7-local_11.7.0-1_amd64.deb
sudo apt-get update
sudo apt-get -y install cuda

or Installation of Linux x86 CUDA Toolkit using Meta Package:

1
2
3
4
5
6
7
8
wget https://developer.download.nvidia.com/compute/cuda/repos/ubuntu2004/x86_64/cuda-ubuntu2004.pin
sudo mv cuda-ubuntu2004.pin /etc/apt/preferences.d/cuda-repository-pin-600
wget https://developer.download.nvidia.com/compute/cuda/11.7.0/local_installers/cuda-repo-ubuntu2004-11-7-local_11.7.0-515.43.04-1_amd64.deb
sudo dpkg -i cuda-repo-ubuntu2004-11-7-local_11.7.0-515.43.04-1_amd64.deb
wget https://developer.download.nvidia.com/compute/cuda/repos/wsl-ubuntu/x86_64/cuda-keyring_1.0-1_all.deb
sudo dpkg -i cuda-keyring_1.0-1_all.deb
sudo apt-get update
sudo apt-get -y install cuda-toolkit-11-7

Check the environment by:

1
nvcc -V

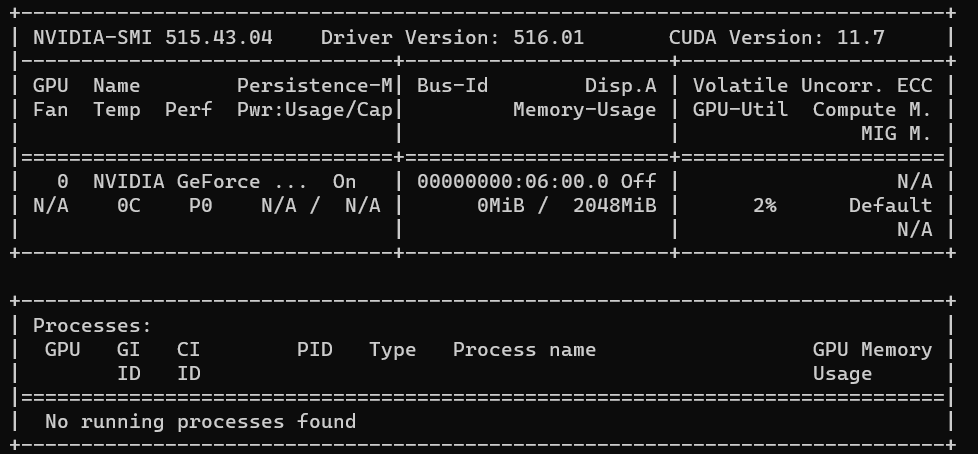
If there is nvida not found, it should be the environmental problem:

Set the environmenal Inside of the .bashrc file, update the path as follows:
export PATH="/usr/local/cuda-11.7/bin:$PATH"
export LD_LIBRARY_PATH="/usr/local/cuda-11.7/lib64:$LD_LIBRARY_PATH"

Check the nvidia-smi:

1
nvidia-smi

image-20220918124124743

WSL

Check the version of wsl

1
wsl -l -v

Update from wsl 1 to wsl2

change the default version into wsl2.

1
wsl --set-default-version 2
1
wsl.exe --set-version Ubuntu 2

Anaconda

This will show how to install the anaconda at the Ubuntu system:

The first step should be wget the downloaded file:

1
2
3
wget https://repo.anaconda.com/archive/Anaconda3-2022.05-Linux-x86_64.sh
# after we downloaded the Linux Version anaconda, we need to run the .sh file, and we just choose yes
sh Anaconda3-2022.05-Linux-x86_64.sh

If there is a conda not found problem, we need to fix the environmental variables:

1
2
3
4
5
6
7
8
9
10
11
12
# check the bashrc file
vi ~/.bashrc

# insert the path loc
export PATH=$PATH:/root/anaconda3/bin/


# excecute file, the conda can be found
source ~/.bashrc

# or we can set the environment into true
conda config --set auto_activate_base true

Create a Python Env

1
2
3
4
5
6
7
8
9
10
11
12
13
14
# create a conda env name "env_name"
conda create -n env_name python=3.8

# activate the env
conda activate env_name

# deactivate the env
conda deactivate env_name

# create a conda env with environment.yml
conda env create --name env_name -f environment.yml

# update the conda env with environment.yml
conda env update --name $MYENV -f environment.yml

Environment.yml

This is an example of environmental.yml from shennong package.https://docs.cognitive-ml.fr/shennong/index.html

1
2
3
4
5
6
7
8
9
10
11
12
13
14
15
16
17
18
19
20
21
22
23
24
25
26
27
28
29
name: shennong
channels:
- conda-forge
- coml
dependencies:
- python>=3.6
- shennong-pykaldi
- ffmpeg
- h5features>=1.3.2
- h5py<3.0 # because h5features supports only h5py-2.*
- hmmlearn>=0.2.0,<0.3.0
- joblib
# shennong-pykaldi is compiled on numpy-1.15, so shennong must stay on the
# 1.15 version
- numpy==1.15.*
- pip
- pydub
- pytest>=5.0
- pytest-cov
- pytest-runner
- pyyaml
- scipy
- sox # sox binary
- sphinx
- sphinx_rtd_theme
- tensorflow<2.5
- pip:
- json-tricks==3.15.*
- sox # pysox

Pytorch

Install Pytorch

We need to install the pytorch:

1
pip3 install pytorch

Check the Version of the Pytorch

1
2
import torch
print("Torch version:", torch.__version__)

Heroku

Create a heroku server.

1
heroku create

Push the original codes into the empty projects.

1
git push heroku HEAD:master

Linux Environment

1
2
3
4
5
# from https://github.com/kaldi-asr/kaldi/issues/515 @ willendzw
# The env.sh is not under tools/extras/. It is under tools/. So you just need to
source env.sh. It just add irstlm path. Eg:
export IRSTLM=/home/willen/Documents/kaldi/kaldi/tools/irstlm
export PATH=${PATH}:${IRSTLM}/bin

AWS Ubuntu EC2

image-20220918004648297

We can use the AWS and install it by this video tutorial: https://www.youtube.com/watch?v=NuB2BTYNosE&t=81s

1
2
3
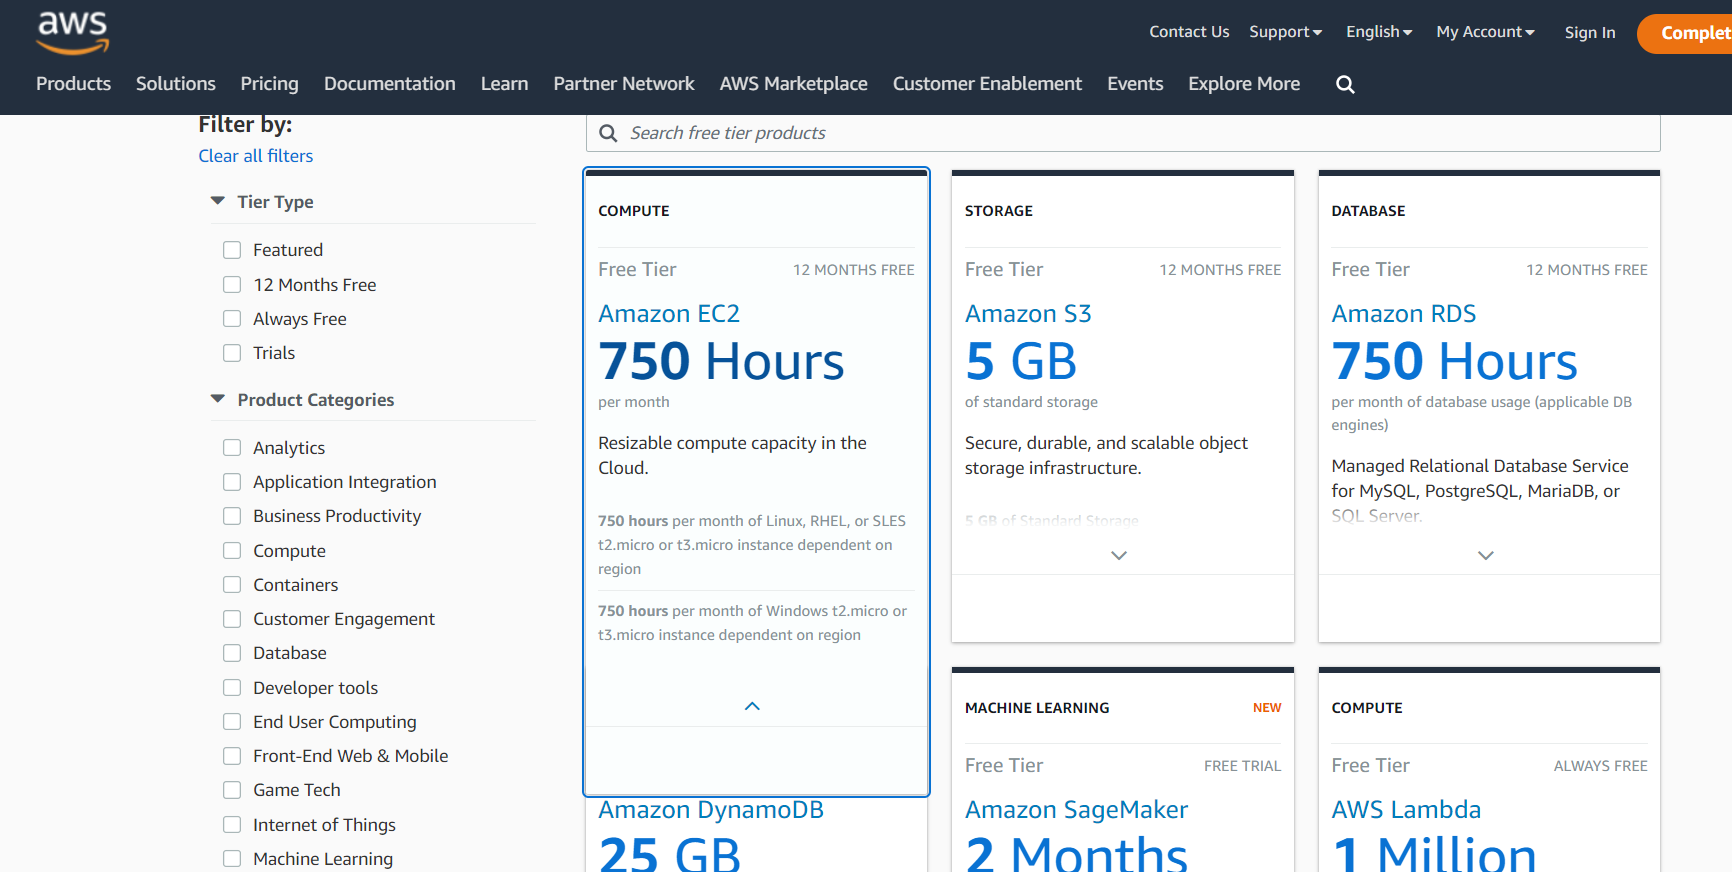
# Connect the ec2 server to ssh
ssh -i ...pem ubuntu@Public IPv4 DNS copied # if you are using ubuntu please change the username "ec2-user" into "ubuntu", otherwise just it.
ssh -i xiao.pem ec2-user@ec2-3-248-220-97.eu-west-1.compute.amazonaws.com

Librosa

Here is the scripts that installed in case that it will be facing the incompatibale issues for librosa installing.

1
2
3
conda install -c numba numba

conda install -c conda-forge librosa

Here is one example:

1
2
3
4
5
6
7
8
9
10
11
12
13
14
15
16
17
18
19
import matplotlib.pyplot as plt
import scipy
import librosa
import numpy as np
y, sr = librosa.load("/mnt/c/Users/ABC/SPTK/egs/analysis_synthesis/lpc/data.org.wav", duration=0.020)

a = librosa.lpc(y, order=4)
b = np.hstack([[0], -1 * a[1:]])

y_hat = scipy.signal.lfilter(b, [1], y)
fig, ax = plt.subplots()
ax.plot(y)
ax.plot(y_hat, linestyle='--')
ax.legend(['y', 'y_hat'])
ax.set_title('LP Model Forward Prediction')

plt.savefig("out.png")
plt.show()

The saved png file can be looks like that:

out

Here is a very good tutorials to express the librosa in the speech recognition and processing tasks:

https://medium.com/wavey-ai/end-to-end-speech-recognition-f13f0d0197c7


Audio and Speech Processing Development Environment
http://xiaos.site/2022/07/30/Audio-and-Speech-Processing-Development-Environment/
Author
Xiao Zhang
Posted on
July 30, 2022
Licensed under